Additionally, club email sends are limited to 10,000 contacts in a single send. This restriction is enforced, as mass mailers of more than 10,000 will be blocked as spam by mail providers, resulting in a service stop. If your List is larger than 10,000 contacts, please use the List Builder to segment your List, or the Customer Importer split the List into different contact types.
The Send Club Email tool helps send an email document to your club members. The following text will outline some key points in sending a mass email to your club members.
Send Club Emails
1. Go to Store > Clubs > Send Club Email.
2. Under General, select the Category that the document is saved in (i.e., Club Emails)
3. Select the Email you want to send from the Document drop-down.
4. Check the first Send To box if you're sending the Email to a single individual. Here you can type in the email address. For mass emails, you will skip this and move to step 5.
5. Check the second Sent To box if you're sending the Email to your club members. From the drop-down menu, select the List you would like to send the Email to. For more information on building lists, see the List Builder Documentation >
Note that if you choose to use the first "Sent To" field and enter an individual email address as opposed to selecting a contact list, any auto-populating tags used will not work. Email must be sent to a contact list to pull in and generate customer data. Click here to learn more about Auto-Populating Tags.
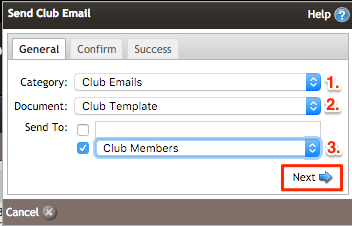
6. Click Next.
7. The Confirm tab allows you to review how many club members you will send your email document to.
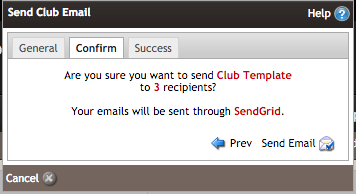
Once you've confirmed your selected email document, click Send Email.
8. The Success tab will confirm how many successful emails were sent.
Test Emails
Emails are tricky to master, and they take time to create. We always recommend testing email blasts with Gmail, Yahoo, Outlook, and any other services before you fully send out that mass Email - you would want to be sure that all the email clients can display the Email Document the way you want to display it.
Club emails cannot be scheduled to be sent automatically by the WineDirect platform; an admin user must complete this process manually.