Creating A POS Profile
When the POS option is enabled, a default POS profile will automatically be created using your inventory and pickup location. You want to use the following steps to create or edit a POS profile:
1. Access Settings > POS Profile in the WineDirect admin panel.
2. Click Add POS Profile from the left-hand menu.
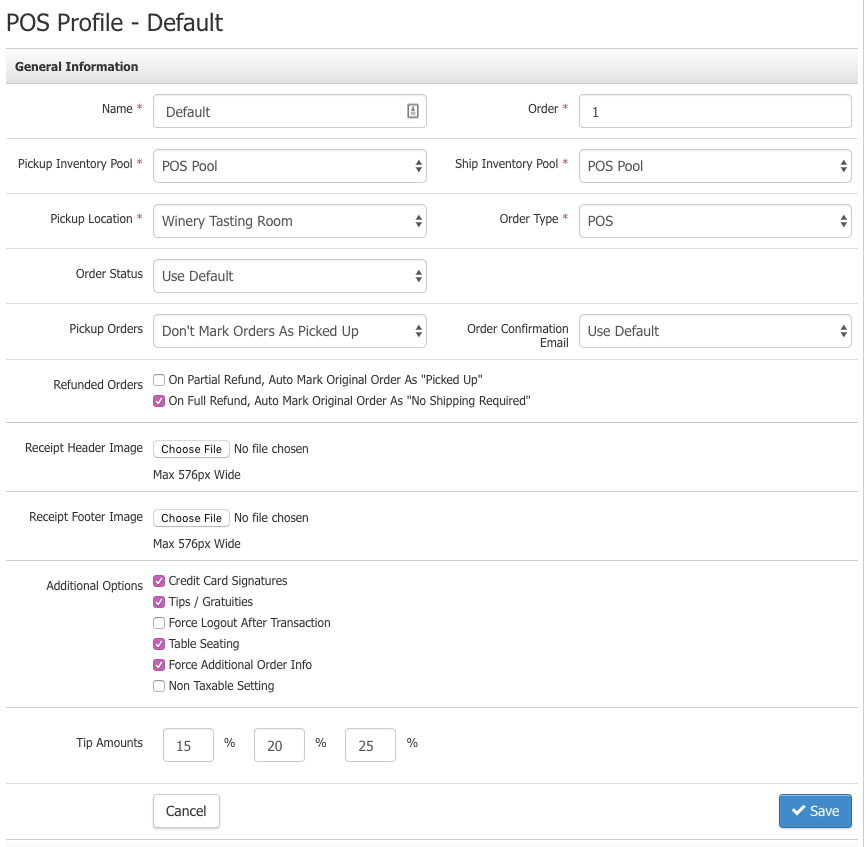
3. Fill out the POS Profile form. Please see the Field Definitions table below for further clarification regarding each field.
4. Click Save to save your Profile.
Now that you have the basic POS profile setup, you will want to create and assign POS Categories to your Profile. Continue to the Assigning POS Categories documentation below to learn how.
Field Definitions
| Name | The name of your POS profile. It would be best to use the name of the tasting room area or location for this POS profile. |
|---|---|
| Order | The Order in which the POS Profiles will appear within the admin panel. |
| Pickup Inventory Pool | This allows you to specify which inventory pool you want to use for Pickup orders through your POS. Orders through the POS system by default are pickup orders unless the Order is marked as a shipping order and a shipping address is included in the Order. Because your orders are pickup by default, the Pickup Inventory Pool will be the primary inventory pool used by the POS platform. It will pull inventory from this pool for all orders except those shipped. This allows you to maintain separate inventory pools for your website & POS application. |
| Ship Inventory Pool | This allows you to specify which inventory pool you would like orders that are being shipped to pull from. If you are using a fulfillment house, it would be best to ensure this inventory pool you select is the same pool your fulfillment house uses for your website. |
| Pickup Location | Allows you to specify which pickup location address will be used for orders on the POS. This should be set to the tasting room location where the POS application will be used. Please see the Pickup Locations Documentation for more information on setting up pickup locations, |
| Order Type | Allows you to choose the order type you want your POS orders to be marked as. By default, an order type of 'POS' will be used on all orders originating from the POS system. For more information on order types, please see the Order Types Documentation. |
| Sale Type | Onsite orders or Offsite orders. |
| Compliance | Default Settings, Ship Orders Only, or All Orders. |
| Order Status | Allows you to adjust the order status attached to orders placed through the POS.
|
| Pickup Orders | Allows you to choose whether POS pickup orders are automatically marked as picked up when placed on the POS application.
Please Note: Shipped orders will not automatically have a shipping status assigned to them. |
| Refunded Orders | It allows you to determine what happens to an order's Shipping Status when it is refunded.
|
| Order Confirmation Email | Allows you to choose an alternate order confirmation email for all POS orders. By default, the standard Order Confirmation system email is sent out for all orders placed through the Website, Mobile Site, Facebook, Admin Panel, or POS. For creation information, please see the Emails Documentation. Emails that are assigned to POS profiles cannot be deleted. The POS profile(s) must be updated to use a different email document before it can be deleted. |
| Receipt Header Image | Upload an image in JPEG format with a max of 576 px wide and 300 px tall for your receipt Header. Typically this is your logo. If a header image is not uploaded, the receipt will automatically add a plain text company name, the same name you see in the top left of your admin panel. |
| Receipt Footer Image | Upload an image in JPEG format with a max of 576 px wide for your receipt footer. |
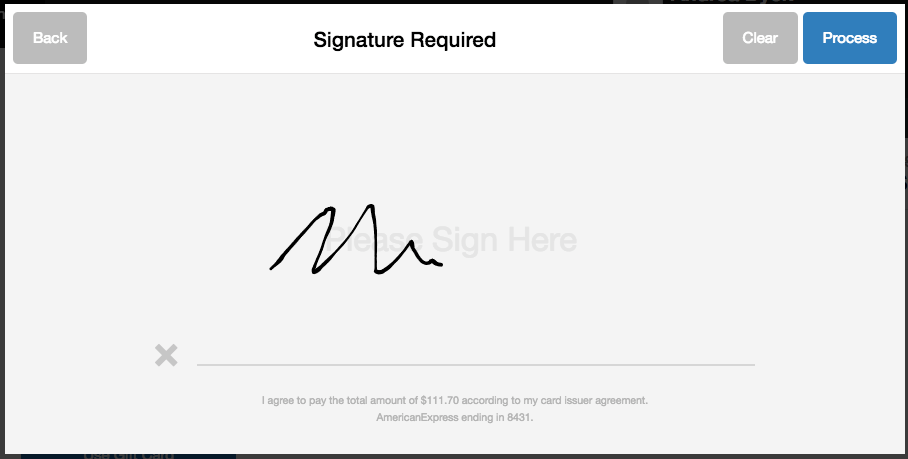
| Credit Card Signatures | Check this box if you require customers to sign for orders paid by credit card.
|
| Tips / Gratuities | Allows customers the option to select Tips/Gratuities for their Order. It also enables reporting on the tips for the Store section and Sales reports. You must help with this on each Profile if you have multiple POS profiles. |
| Force Logout After Transaction | If you have POS PINs enabled, this setting will be on by default. You can uncheck this box if you prefer not to have your staff enter a PIN to begin each transaction. |
| Table Seating | Enable table seating and other Restaurant Tools in the POS. |
| Force Additional Order Info? | Check this box to have the Additional Order Info screen appear at the end of the order process. This screen allows you to adjust such items as sales associates and order types, add fulfillment-related order notes, etc. If you have POS PINs set up correctly, your Sales Associate will automatically be linked to the PIN, and you do not need to fill that section. |
| Non Taxable Setting | When enabled, users will be able to process Orders without tax, as well as set a Contact as a Non-Taxable Contact. |
Assigning POS Categories
The POS Categories section allows custom category menus per POS Profile so that different tasting rooms or unique profiles can have diverse product lists.
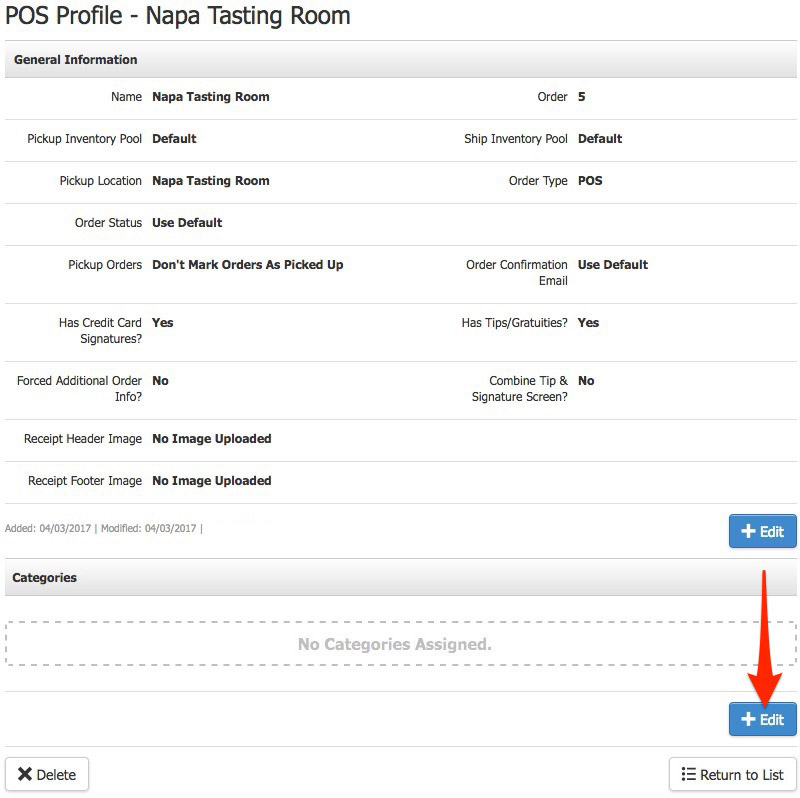
1 . From the POS Profile screen, select the POS Profile to which you want to assign categories.
2. Click Edit under the Categories section.
3. If you have not created any POS Categories, click Add New to create a new POS Category. (You can also create and manage your POS Categories from Store > Products > POS Categories).
4. Check the boxes next to the POS Categories you want to assign to your POS Profile (i.e., tasting room location).
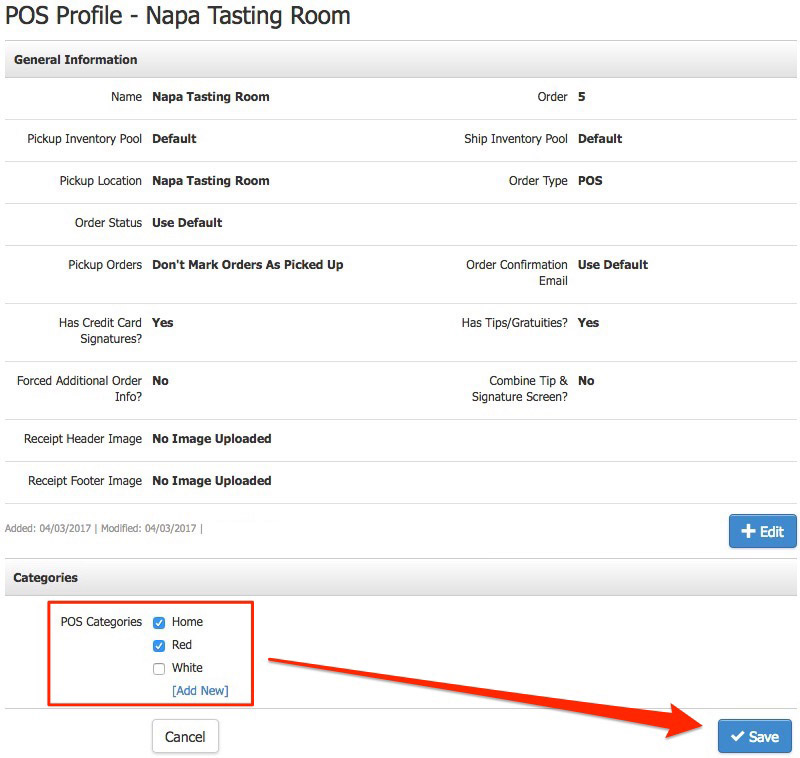
5. Click Save.
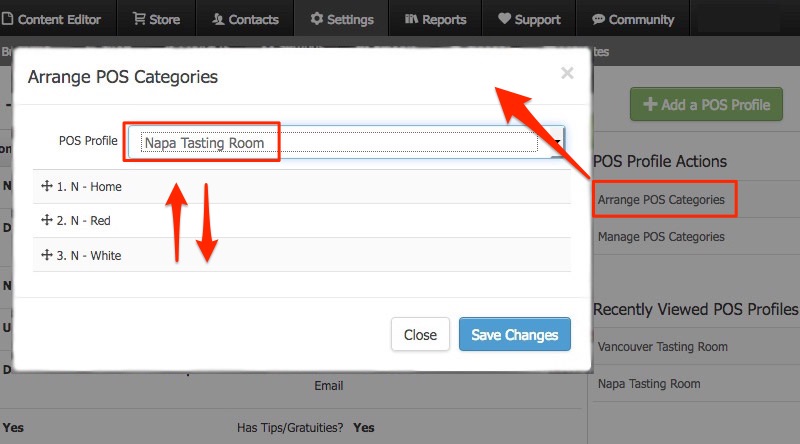
From the Arrange POS Categories section, you can adjust the display order of the categories on the POS drop-down.
Select the POS Profile you are working with from the drop-down and drag and drop the categories into the desired display order.
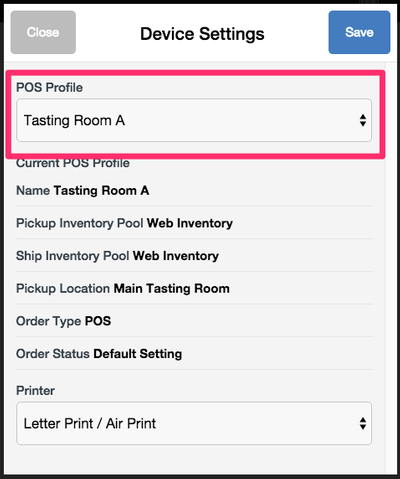
Assigning A POS Profile to A Device
You can switch between profiles from Device Settings in the POS app menu if you have more than one POS profile. Once a POS profile has been assigned to a device, it will remember it and use those POS profile settings for each admin that logs into that device until another shape is chosen.
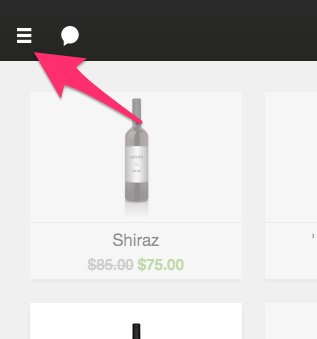
1. Start by clicking the Menu button on the top right of the POS.
2. Click Device Settings from the left-hand menu.
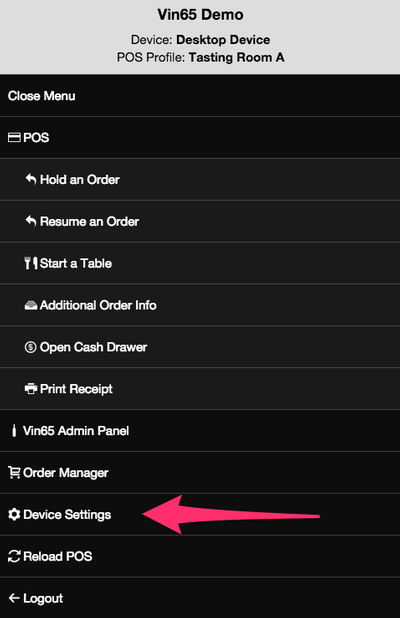
3. Select your POS profile and click Save in the drop-down menu.
POS Profile FAQs
Do I have to create a POS Profile?
Yes. Before you can successfully log into the POS application you must create a POS profile. If you try to login to the POS before at least one POS profile has been created you will receive an "Invalid POS Profile" message when trying to login.
Can I have multiple POS Profiles?
Yes. Only one POS profile is required to use the POS application, however you can create multiple POS profiles to have easy access to different sets of settings.
Can the credit card signature option be used on iOS and desktop POS?
Yes. The credit card signature option is supported by both the iOS and Desktop (Chrome browser) versions of POS. Collecting signatures on the desktop will require a touchscreen monitor that can be turned to the customer, allowing them to sign for credit card transactions.
Can I have different product listings for other devices?
Yes. Products are assigned to POS Categories, and different POS Profiles can have different sets of categories.
You will need to create POS Categories, assign the POS Categories to a POS profile, then assign products to the categories.
When naming your categories you will want to make sure that they are unique. So if you want to have two Home menu items for a location in Napa and one in Vancouver, call one N - Home and V - Home, as an example.