- 29 Mar 2023
- 2 Minutes to read
- Print
- DarkLight
- PDF
Product Brands
- Updated on 29 Mar 2023
- 2 Minutes to read
- Print
- DarkLight
- PDF
Add A Brand
1. In the Admin Panel, navigate to Store > Products > Product Brands.
2. Click [+] Add A Product Brand.
General Information
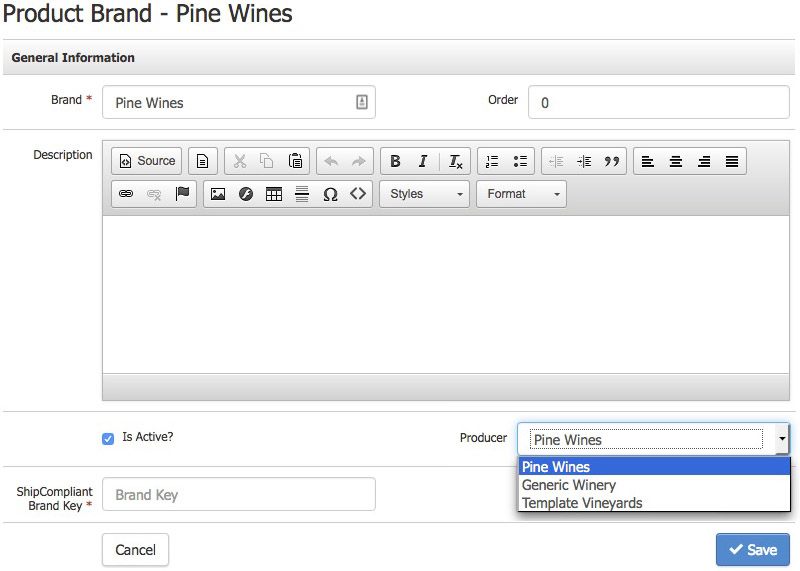
1. Enter the name of the Brand under the Brand field.
2. You can use the marketing URL you create for each Brand as the landing page for that Brand. If you plan to send customers to this page, add content to the Description field. This can include text, images, and additional links like any content editor page.
3. Set the Brand to Active so you can begin applying the Brand to your products.
4. Click Save.

| Brand | The name of the Brand you are creating. |
|---|---|
| Order | The "Order" in which your Brand will be listed in the admin panel. |
| Description | Here you can input a description of your Brand. |
| Is Active? | Check this box to allow your Brand to appear as a selectable option in your admin panel. |
| Producer | If you are an Enterprise client and are set up with Master Products (where multiple websites share a single set of products across all the websites), you must set the producing winery when creating a brand. This will allow marketplaces and other connected integrations to associate the correct Brand with the correct winery, even if the wine is sold on multiple websites or marketplaces. |
| ShipCompliant Brand Key | If you use ShipCompliant for compliance and tax needs and enable the ShipCompliant Product Sync, then the ShipCompliant Brand Key will be a mandatory field. This key will be one that you have created in ShipCompliant to help tie the Brand you have created in ShipCompliant to the Brand you have created in WineDirect. If you are unsure what your brand key should be for a specific brand, please get in touch with your ShipCompliant rep or support@shipcompliant.com. |
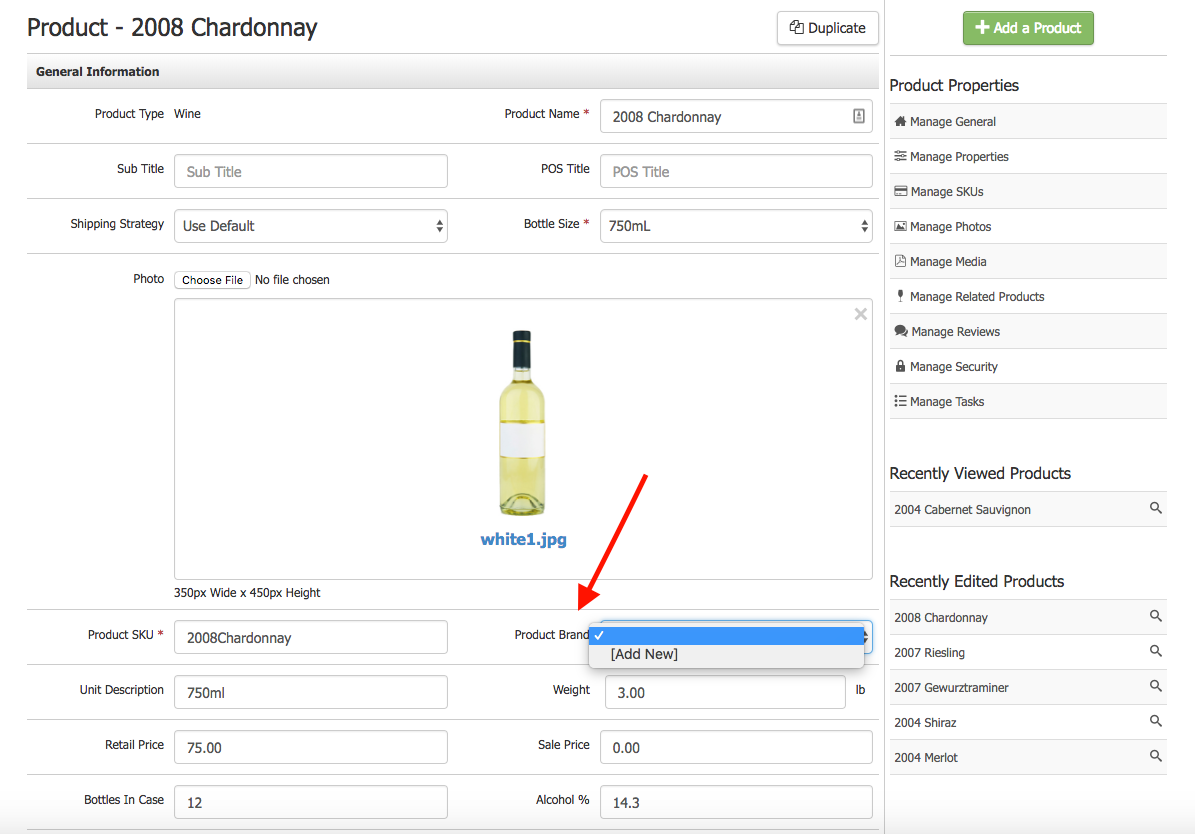
You can also add a product brand when creating a new product without ever having to leave the product setup page. Select Add New from the Product Brand dropdown within the General Information section:

Marketing
The marketing section allows you to modify a brand's URL and marketing information. This information will automatically be generated and saved when you create a new brand based on the name of the Brand.
1. Under the Marketing section of the Brand, click Edit.
2. Edit any of the marketing fields. Suppose you have many products and plan to use our advanced product search functionality. This meta information will be used on a category page created specifically for this Brand for search purposes.

| Marketing URL | A shortened version of the URL, which contains the product brand information. This will automatically be generated based on the name of the Brand.
|
|---|---|
| Meta Tag Title | The tag title will appear at the top of your web browser tabs. |
| Meta Tag Description | A summary that gives Google and other search engines a description of what the page is about. |
3. Click Save.
Apply A Brand To A Product
1. Go to Store > Products and click on the product you want to edit.
2. Click Edit under the main General Information section.
3. Select the Brand you want to apply to the product from the Product Brand dropdown, which lists all your created brands.
4. Click Save.


