What is an Inter-Center Transfer?
The Inter-Center Transfer process allows clients to create an inventory movement submission that grants the client full visibility into each stage of the inventory move from one warehouse to another.
How does the Inter-Center Transfer benefit our clients?
Key Customer Benefits:
• Bypass the OUT fees traditionally incurred via Inter-Center Transfers
• Automated billing: system-generated billing based on actual transfer quantities
• Increased Inventory Visibility through the Inter-center transfer process:
o Inventory moves from
1. Origin sub-Inventory
2. Reserve for Warehouse Transfer sub-inventory
3. In Transit for Warehouse Transfer sub-inventory
4. Destination sub-Inventory
How to Create an Inter-Center Transfer
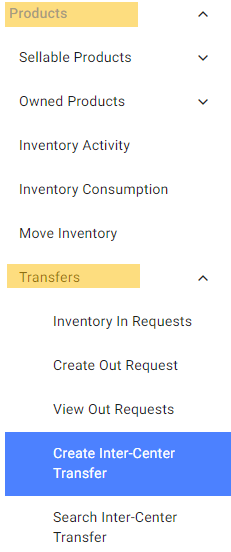
From the fulfillment portal home page click:
- Products
- Transfers
- Create Inter-Center Transfer
- Transfers
Select your Vendor (Supplier) account name.
Select which WineDirect warehouse the wines will be transferred from.
Select which WineDirect warehouse the wines will be transferred to.
Enter Customer Ref # (this is for winery to easily identify what was on transfer/what club it was for/etc.)
Then click the “Build Transfer” Icon.

Once “Build Transfer” has been selected a new section will appear titled “Lines”. This will be where similar to an Inventory IN or OUT request, you will start entering the SKUs you’re looking to transfer and how much inventory is available to select.
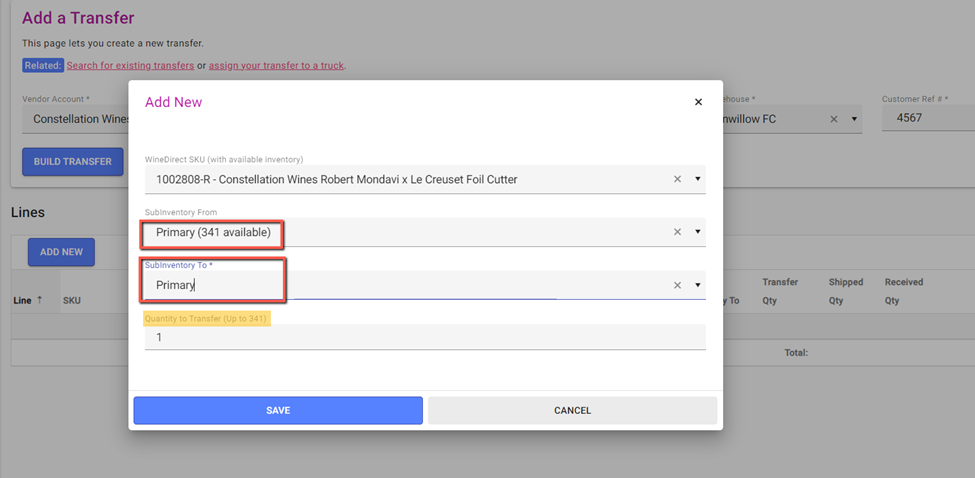
Once you’ve selected a SKU, you’ll then select which Subinventory you’re looking to transfer from the current WineDirect warehouse (and that will identify how much of said SKU is available).
You’ll then select which Subinventory you want to transfer to at the next WineDirect warehouse.
The “Quantity to Transfer” will be where you enter the total amount you want to transfer. Please note that it should always default to a quantity of 1, so you must ensure you enter the correct intended amount.
You will then see the Inter-Center Transfer number that has been assigned, right next to your Customer Ref #, the ability to add any additional notes at the bottom of the page for anything important we may need to be aware of, add additional SKUs (line items), and click the trash can icon in the event you entered the incorrect SKU/sub inventory/quantity/etc. and be able to enter the correct information.
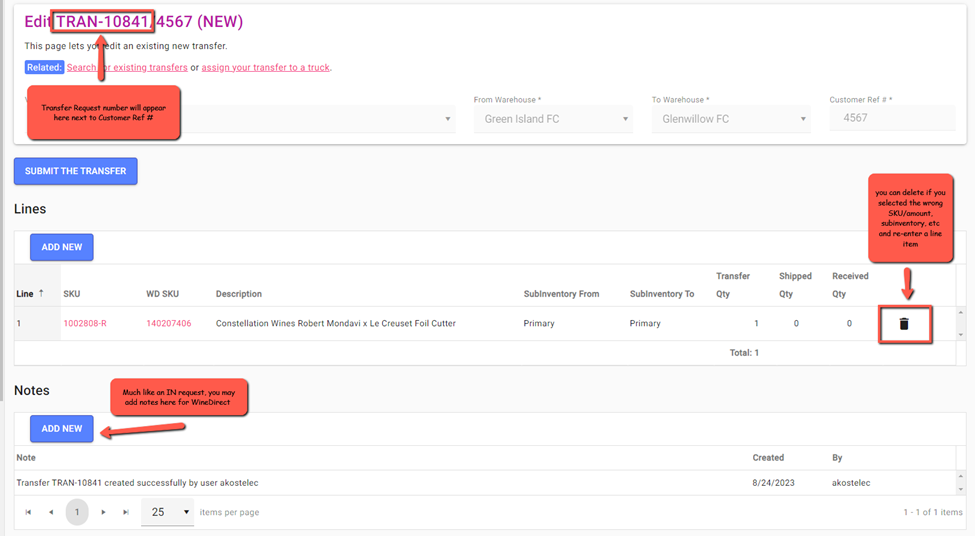 Once everything looks good, click the “Submit The Transfer” icon and your Inter-Center transfer request will be in the system and our receiving teams will begin the process of getting everythign scheduled for the next available transfer truck.
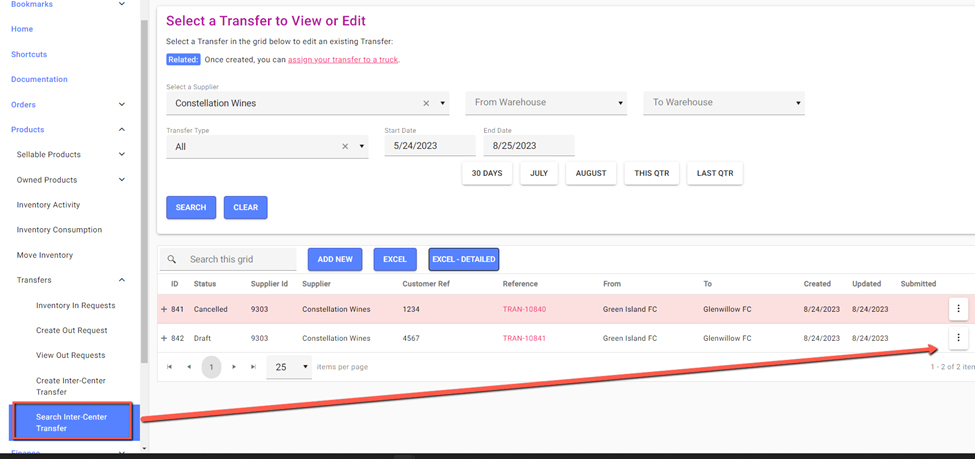
In the event you need to cancel an Inter-Center Transfer before it has been submitted:
• Find and click on “Search Inter-Center Transfer”
• Locate and click on the 3-dot icon near the right-hand side of the page
• Select Delete
• A small window will appear asking to confirm deleting the specific Inter-Center Transfer number
• Click on the “Confirm” icon